Custom Schema Markup Setup Guide
Want full control over your structured data? Or need a schema type that isn’t available by default?
Custom Schema in Schema Package lets you manually define any Schema.org type and properties, making it perfect for advanced SEO, AI understanding, and experimental schema use cases.
This guide will show you how to add a Custom Schema using the Schema Package WordPress plugin.
What Is Custom Schema?
A Custom (or Empty) Schema is a blank schema container where:
- No predefined fields are added automatically
- You decide the
@type - You manually add only the properties you need
It’s ideal when:
- The schema type you want isn’t listed.
- You have schema JSON from an SEO audit or client
- You need advanced or non-standard schema setups
Why Use Custom Schema?
Using Custom Schema helps with:
✅ Maximum Flexibility – add any Schema.org type
✅ Advanced SEO Use Cases – niche or uncommon schemas
✅ AI Content Understanding – precise control over structure
✅ Client-Provided JSON-LD – paste and use directly
✅ No Plugin Limitations – you’re not restricted by UI fields
When Should You Use Custom Schema?
Use Custom / Empty Schema for:
- Schema types not available in the dropdown
- One-off or experimental schemas
- Highly customized article, dataset, or entity schemas
Avoid using it if:
- A predefined schema already fits your use case
- You want a quick, beginner-friendly setup
How to Set Up Custom Schema in Schema Package
Schema Package offers two ways to add Custom / Empty Schema.
✅ Method 1: Add Custom Schema from Dashboard (Global Setup)
Best when you want the schema applied to multiple posts, post types, or globally.
Steps:
- Go to WordPress Admin → Schema Package
- Click Add New Schema
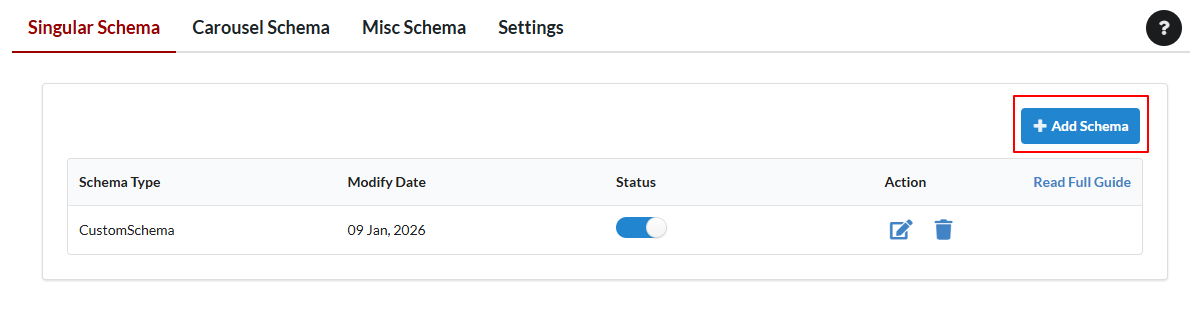
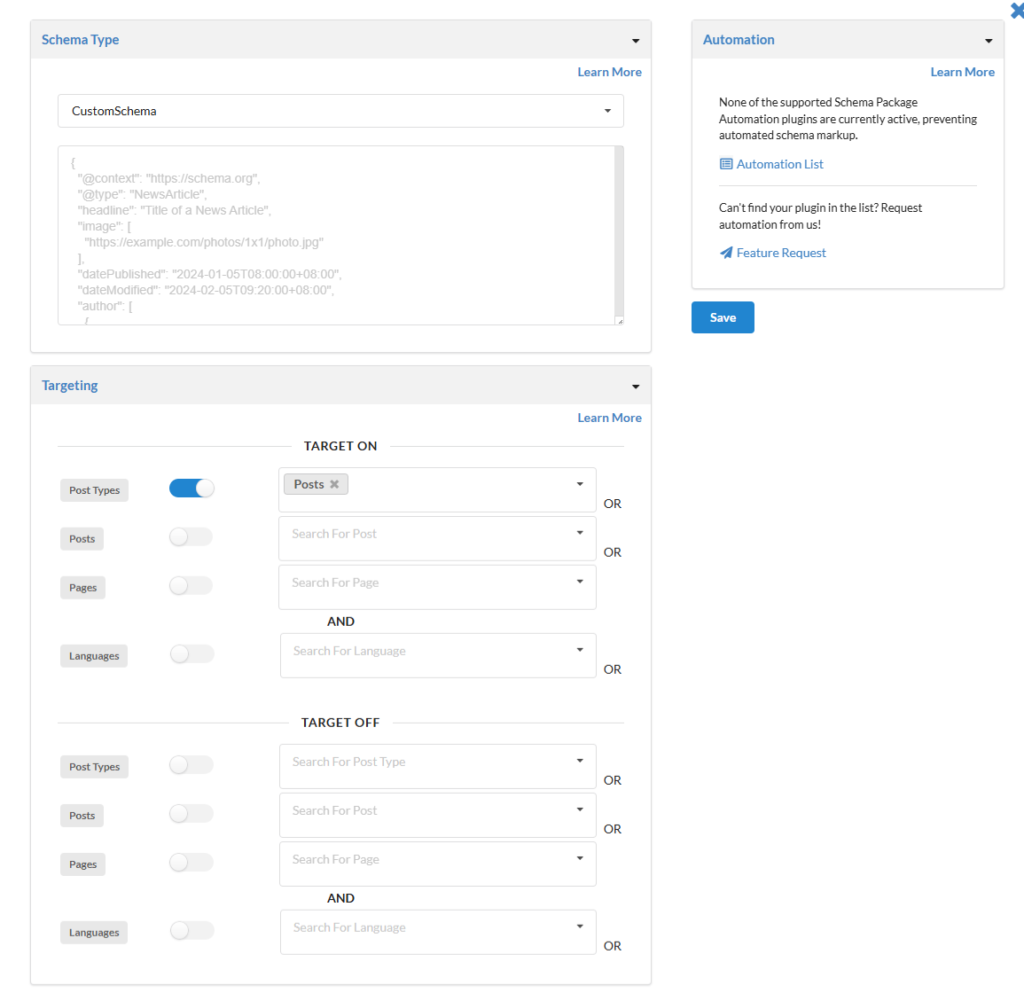
- From the Schema Type dropdown, select:
- CustomSchema
- Paste your custom Json-ld
- Set targeting rules:
- Specific post types
- Specific posts or pages
- Click Save
✅ Method 2: Add Custom Schema Per Post (Schema Package Generator)
Best for one-off schemas or posts that need unique structured data.
Steps:
- Open a post or page in the WordPress editor
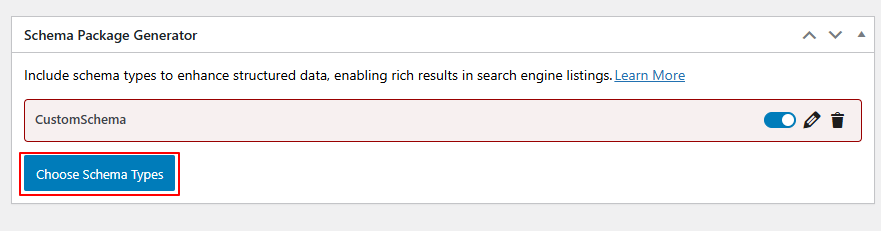
- Scroll down to Schema Package Generator
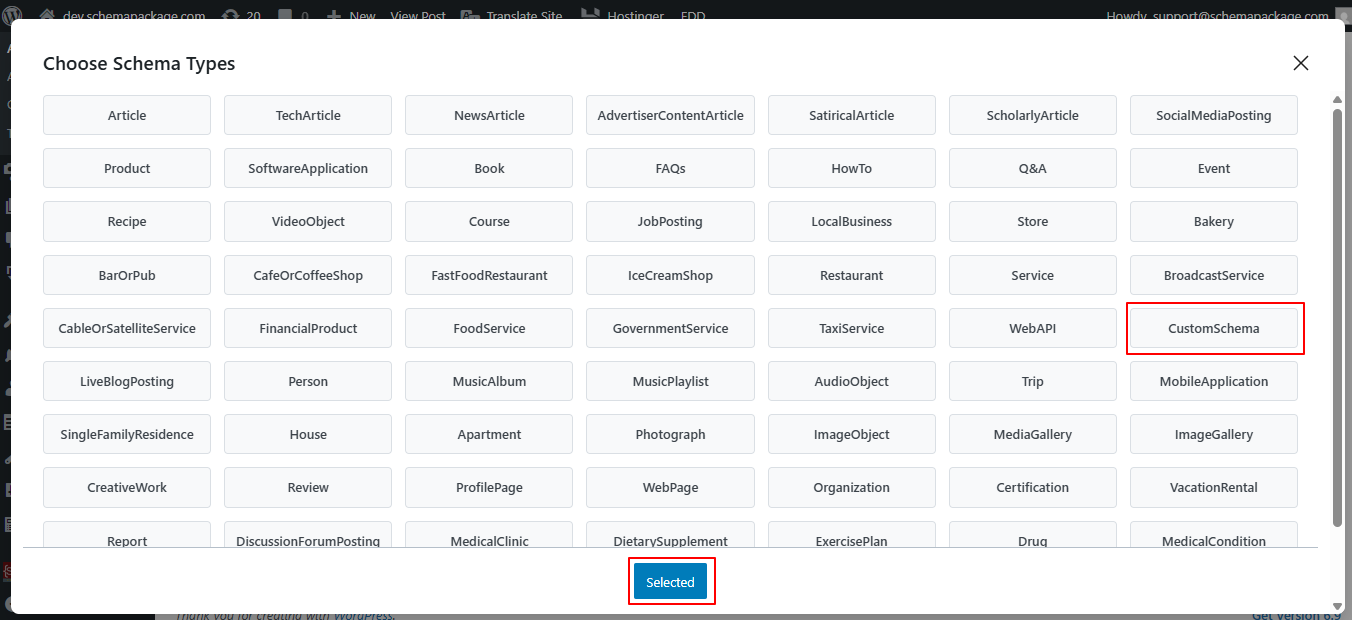
- Click on Choose Schema Type — a popup will appear showing the list of available schema types.
- Select CustomSchema as the schema type and click the Selected button. The Custom schema will now be added to the post.
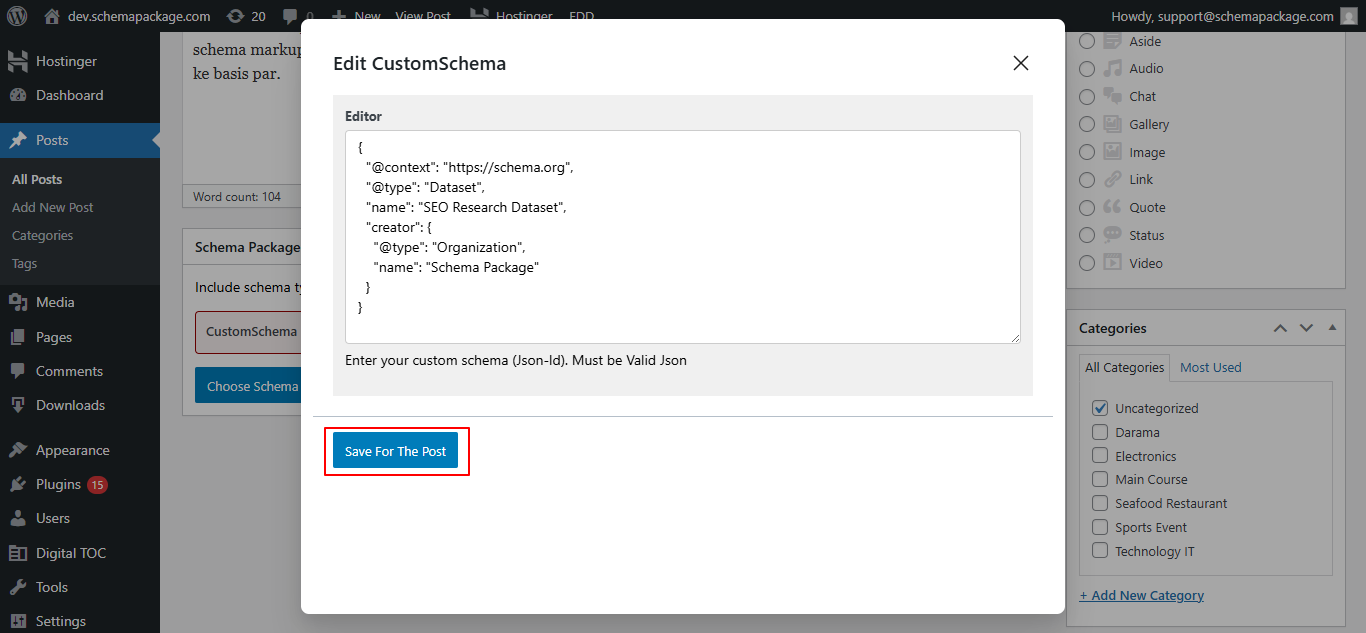
- Click the Edit icon next to the added CustomSchema. A second popup will appear with a textarea
- Fill in the required details, then click the Save for Post button.
- Finally, Save or Update the post to apply the changes.
Test Your Custom Schema
Always validate your schema after setup:
Limitations of Custom Schema
- No default fields
Custom schema starts completely blank, so@typeand all properties must be added manually. - No automatic validation guidance
The plugin does not enforce required or recommended fields for search engines. - Higher chance of errors
Small mistakes like typos, wrong nesting, or invalid values can break the schema. - Rich results are not guaranteed
Using custom schema does not automatically qualify content for Google rich results. - Time-consuming for multiple posts
Adding and managing custom schema on every post or page can be slow and repetitive, especially on large sites. - Requires schema knowledge
Best suited for advanced users who understand Schema.org structure and properties. - Possible schema conflicts
May conflict with schema output from other plugins or themes if not managed carefully. - Manual maintenance required
Any updates to Schema.org or Google guidelines must be handled manually.